Overview
Scheduled Reporting allows you to create a report and receive it in your inbox when you need it.
If a report is available for scheduling, you will see this button:
Creating a report
Click thebutton to create your report.
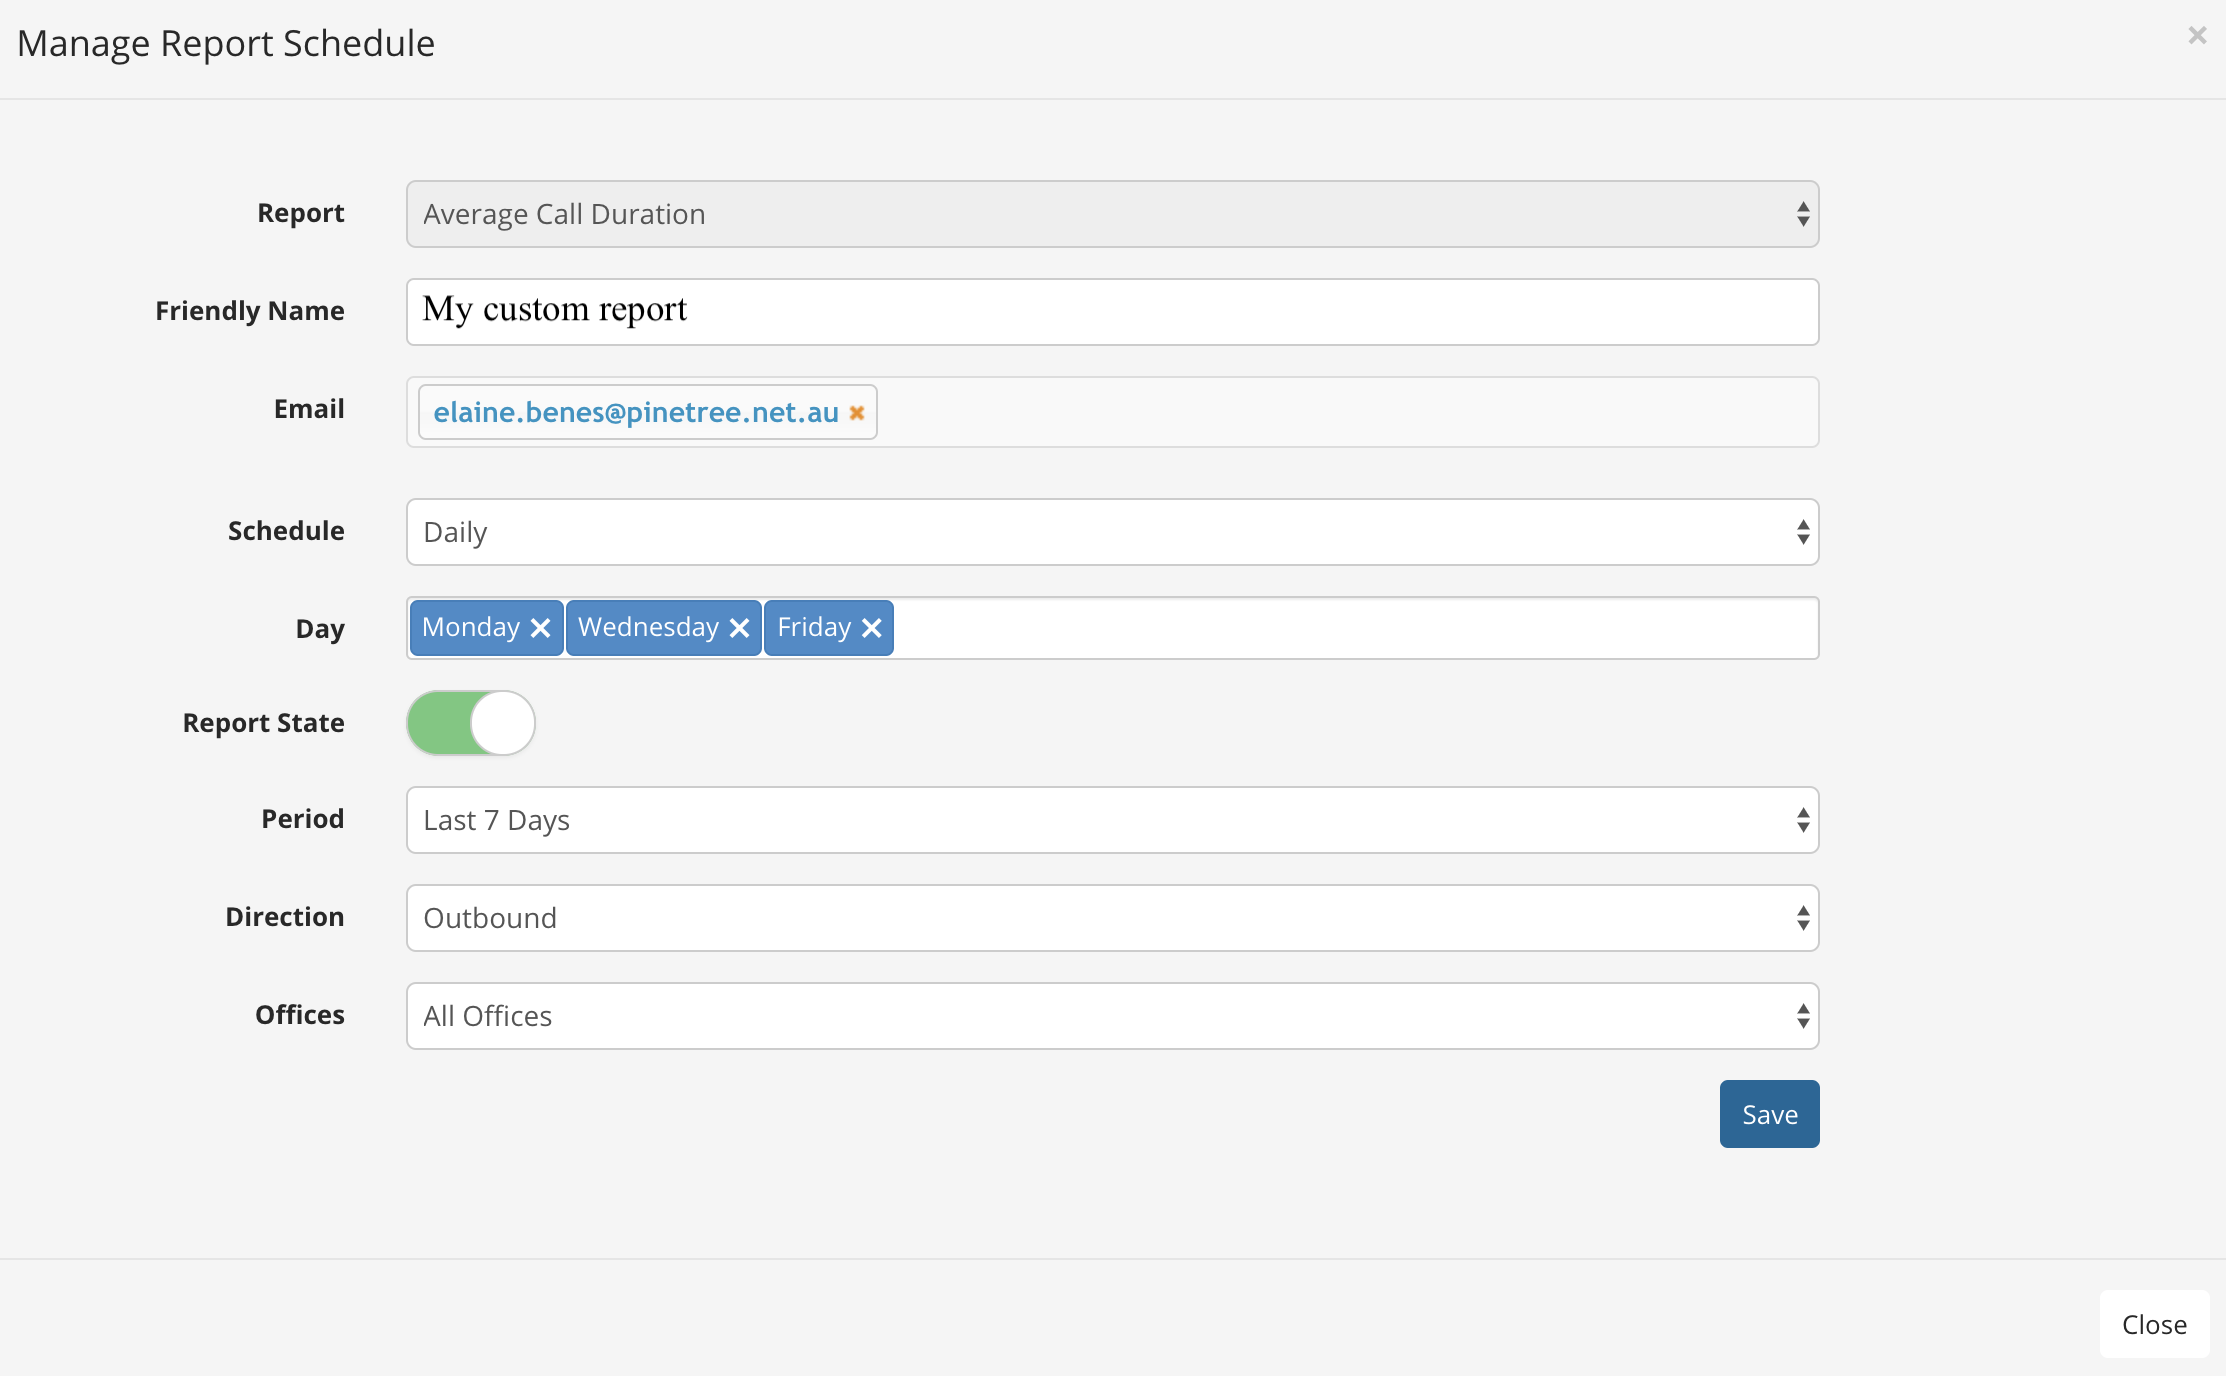
- Report: This is the report type.
- Friendly Name: This is your name for the report.
- Email: Add as many email recipients as required.
- Schedule: Choose from Daily, Weekly, or Monthly.
- Daily: Select the days you wish to receive the report.
- Weekly: Choose the day of the week you wish to receive the report.
- Monthly: Choose the day of the month you wish to receive the report.
- Runs at (Hour): The report will begin generating at this time and the email will be sent upon completion. This does not mean the report will arrive at this time.
- Report State: Use the toggle switch to choose from ON or OFF.
- Period: Choose from the last 7 days, 14 days, or the last month.
- Direction: Choose from Inbound, Outbound, Internal, or All Calls.
- Offices: Choose from a specific office, or all offices.
Tip
Use the Advanced Options to specify an even more detailed day / time to include within your report.
Example: Monday - Friday, only including calls within 9am - 5pm in the report.
When you are finished, click the button.
View / Modify Existing Reports
Click Scheduled Reports from the left-hand menu.
Here you can see the reports scheduled for the PBX including the report type, schedule, operating status, and the date last run.

- To edit a report, click
 .
. - Use the toggle switches to enable or disable a report.
- To delete a report, click
 .
.